Craft Smart Glow in the Dark Paint Review

Top X Tips For Painting With Glow In The Dark Paint
Click here to purchase our glow in the dark paint!
Cheers for checking out our top tips on how to pigment with glow! Glow in the night paint is extremely rewarding to work with simply requires some special considerations to get the best results. We've compiled this list from our firsthand experience and feedback from our customers in hopes of saving you lot time, frustration, and fifty-fifty some money. We've got lots to cover and then allow'due south get started!
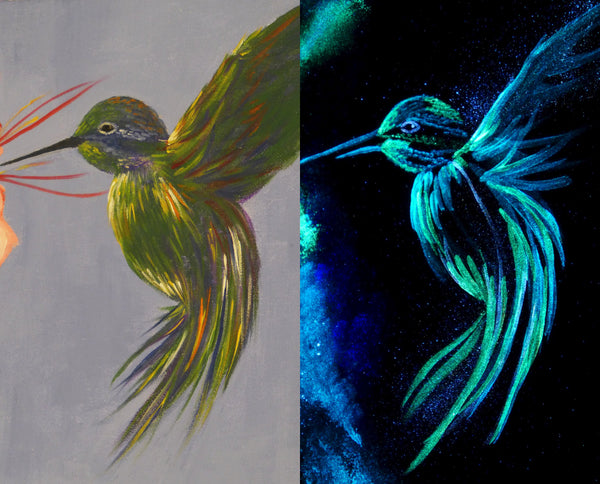
- Most of our paints keep most invisible for the outset few coats. The neutral (daytime white) glow paints will get on invisible for the showtime two or three coats and the fluorescent colors shouldn't be noticeable over a colored background in one or two coats but they may tint a white/light colored groundwork. For more than info specific to fluorescent glow paints please bank check out our blog postal service about their uses and limitations.
The following paradigm has aqua, sky blueish, and yellow-green neutral glow paints over regular acrylic paint. As you tin run across, they are invisible during the mean solar day but glow brightly at night with but a single coat.
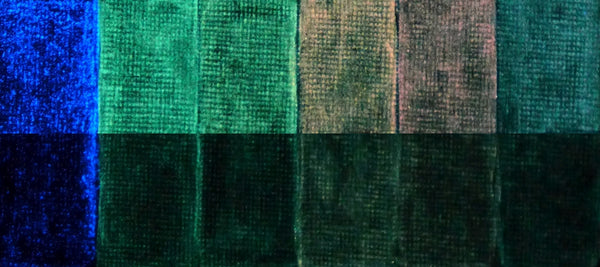
- The lighter the groundwork, the brighter the glow. Since almost of the glow you come across is actually reflected light, the lighter the background color, the brighter the glow will announced. The following image shows two coats of fluorescent glow pigment over a white (meridian row) and black (lesser row) groundwork.
- Employ less pigment than you're used to. Start with less than you think you'll need on your brush, spread it thin, and and so add more paint if necessary. Painting this way volition avoid raised edges that glow brighter than the rest of the brush stroke.
A great fashion to implement this technique and become smooth brush strokes is to place your brush in the heart of where you want the final stroke to be and and then pull the paint in reverse directions to create the stroke. It's not an intuitive technique and it's definitely non the only fashion to become great results, but many of our artists swear by this method.
- Use a black light or ultraviolet flashlight to check the evenness of the castor strokes while they're still moisture. Since the paint goes on clear, you won't exist able to see if the pigment you but laid down is consistently smoothen or if it has slightly raised edges. You can hands check this, even in a brightly lit room, by looking at the paint under one of our UV LED flashlights (you may need to shade the image with your hand). Taking the fourth dimension to practise this will ensure that the edges of your stroke aren't brighter than the residuum of it. You'll notice yourself having to cheque this less and less equally you figure out the correct corporeality of paint to apply to your castor and the sheet.
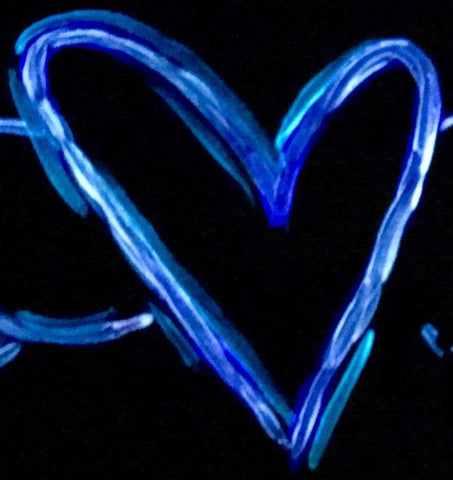
Here's an example of a stroke with raised edges. Continue in listen at that place is cipher wrong with this if it'south the effect you're going for and everyone's preferences are unlike. I think it looks pretty cool and adds some dimension personally.
- Permit the paint dry out for 10 to 15 minutes betwixt coats. Rushing the second coat will actually remove the glow from the commencement coat and leave you with a night spot. Please make sure the paint is completely dry earlier adding additional coats for the best results. You can likewise use a hairdryer on its low setting to speed up the drying process if you want.
- Many people are happy with a single glaze of glow paint but if you want information technology even brighter you can add together some other glaze or 2 for maximum brightness. Additional coats afterward the first 3 will not make much of a difference in the brightness of the glow.
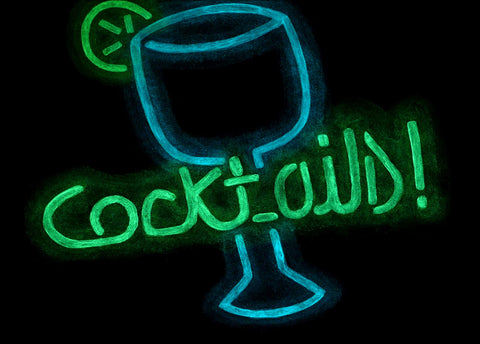
This neon sign painting has just 2 coats of each colour over white paint.
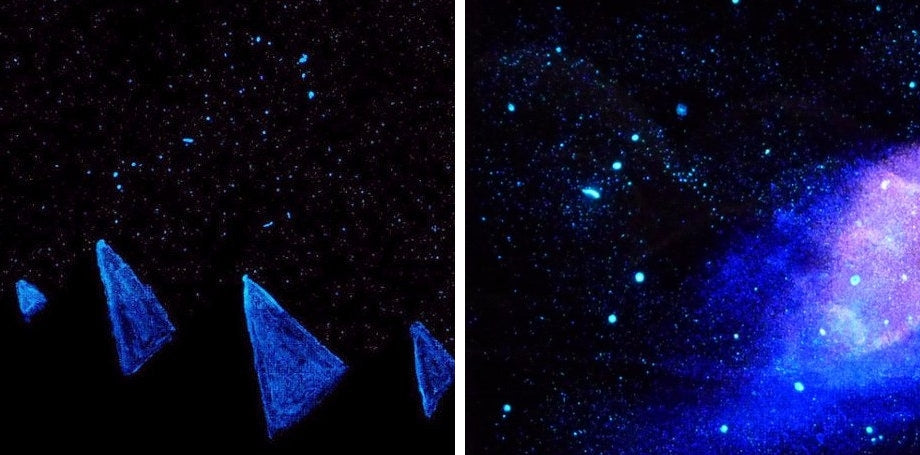
- Y'all can use a toothbrush and toothpicks to create 3 dimensional star field effects. Using newspaper or tape, mask off objects in the foreground so that they will announced to exist in front of the stars later on they're applied. To apply the stars, dip the tips of the toothbrush bristles into aqua or green glow paint, hold perpendicular to the canvas and with the beard a couple of inches away run your thumb upwards the bristles towards you, abroad from the painting. This will moving-picture show hundreds of stars onto the painting! Use a toothpick to add some larger stars for a three dimensional issue.
The mountains in the paradigm below were masked off using painters tape so that the stars appear to be behind them. In both images some of the stars are noticeably larger than others which adds depth and realism to the image.
- For best results, charge with an ultraviolet flashlight, black calorie-free, or the sunday. Household lights volition not charge the glow paint to its total potential so please charge your painting with one of our ultraviolet lights or the sun for the brightest, longest lasting glow! If you desire an even more than powerful charging light, here are several that we have tested and seen that they work well:
- American DJ Blackness Light (Amazon Link)
- OPPSK UV LED Light Bar (Amazon Link)
- Sunlite Meaty Fluorescent Black Light Bulb (Amazon Link) - Experiment and take fun! The possibilities with glow paints and powders are endless so get creative and don't be afraid to try new things. Check out our project ideas page to get inspired by tons of glow in the dark projects and guides.
Resin, glass, wax, rubber, epoxy, plastic, ceramics, rubber markings, fishing lures and more are all potential uses for our products. What volition you lot create?

- Check out all the different colors of Glow in the Dark Paint that nosotros offer to get-go enjoying the magic of glow today! Don't forget a charging light so that you'll accept everything yous demand to create your own glow in the dark painting. Invite some friends over for a paint dark or programme a birthday party that volition be remembered for a lifetime. Whatsoever y'all end up doing, exist sure to send us some pictures or tag the states on social media!
We hope you constitute this guide helpful, just we know that in that location's a lot of data we didn't encompass. If you have whatsoever questions, please let us know in the comments, by emailing us at info@artnglow.com, or by contacting usa via Facebook messenger. We love helping people out!
For a more in-depth guide on creating a glow in the night canvass paintings, please check out our How To Guide.
Source: https://www.artnglow.com/blogs/news/top-tips-for-painting-with-glow-in-the-dark-paint
0 Response to "Craft Smart Glow in the Dark Paint Review"
Post a Comment